Tuesday, October 13, 2015

Mexican Tortilla Casserole

I was trolling Facebook one day and noticed a recipe that a friend of mine had re-posted. It looked pretty tasty. I knew it was something I wanted to make for my family. 

However, I can NEVER make a recipe true to it's originality, so here is my version of the recipe. 

(The original recipe is included at the end of this post to give credit where credit is due.)

You will need a spring-form pan the size of your tortillas. Mine was a 10-inch. Or you could use a deep dish cake pan or other 10-inch round pan, but you need to make sure it's deep enough (at least 3 inches).


Didn't know ahead of time I was going to blog this, so not everything is pictured.


Ingredients: 

20 oz pkg ground turkey (Jennie-O Lean)
3/4 cup diced sweet onion
1 pack McCormack Chicken Taco Seasoning
2 1/2 cups shredded cheese (I used Kraft Mexican 4-cheese blend)
1 can Old El Paso Fat Free Refried Beans (warmed in microwave 30-40 seconds)
1 cup prepared rice (you can use any kind you desire, but I used Minute Multi Grain Medley)
11 oz can Meijer Baja Corn Blend
4 large flour tortillas 
16 oz jar thick & chunky salsa (I used Meijer Naturals Thick & Chunky)

Prep:

The Minute rice I used had microwave directions, so I cooked it that way. 1 pouch (1 cup) rice, with 1 cup water and 1 tsp oil in microwave rice cooker for 10 minutes.

While rice is cooking.... 

Brown ground turkey, with diced onions, in large skillet over med-high heat. I used setting number 7 on my electric stove. When turkey is cooked thru, add the chicken taco seasoning pkt and 1/4 cup water. No need to drain first. Continue cooking a few minutes until seasoning is well blended. Turn off heat. Let sit til ready to use.

Prepare for baking:

Preheat oven to 350 degrees

Spray the inside of your baking pan with non-stick spray.

Bottom Layer: tortilla, 1/3 beans spread evenly, 1/3 meat mixture, about 1/4 cup cheese

2nd Layer: tortilla, 1/2 the rice, 1/2 jar salsa, 1/2 corn, 1/4 cup cheese

3rd Layer: another tortilla with 1/3 beans (I spread beans on tortilla on cutting board then transferred to stack when spread evenly.), 1/3 meat, 1/4 cup cheese

4th Layer: tortilla with bean spread again, rice, meat, corn, salsa and about 3/4 cup cheese to cover everything.

HINT: If you are using a spring-form pan, it will leak from the liquid in the salsa. So, you must place it on a large enough baking sheet while cooking to prevent spillage in your oven. I also sprayed the baking sheet to ensure easier clean-up.

Cover dish with foil and bake in oven for 40 minutes.

Remove foil cover and bake an additional 10-15 minutes til cheese is brown and bubbly.

Let dish set for 5-10 minutes before cutting.


Serve with any or all of your favorite toppings: dice green onions, sliced black olives, sour cream, shredded lettuce, guacamole, etc.

I also have a bag of crispy tortilla strips I considered layering with the dish, but forgot, so we could add those as a garnishment if we want as well.

Hope you like it as much as we did! 


Here is the original copy and paste from the post so the original poster gets the credit for their recipe...


Kristine Peterson with Tammy Sanders and 2 others
MEXICAN TORTILLA CASSEROLE!
1lb. ground beef
1/2 cup diced onion
1 pack taco seasoning mix
2 cups shredded cheddar cheese
1 can refried beans (they spread easier if you warm them in microwave)
1 cup prepared rice (I used Minute Rice)
1 can Mexican blend corn (DRAINED)will only use about 1/2 can
4-5 large flour tortillas
8 oz of thick chunky salsa (your choice mild or hot)
Spray a spring form, round cake pan or casserole with cooking spray
Brown ground beef ,and onion and drain
Add taco seasonings and cook according to package direction
Lay 1 tortilla in bottom of baking dish and spread 1/3 of bean on it ,top with 1/3 of the meat and sprinkle on some cheese .
2nd layer tortilla, 1/2 the rice, 1/2 salsa, 1/2 the corn and cheese
3rd layer tortilla, 1/3 beans ,1/3meat, cheese
4 layer tortilla . beans ,meat, corn, rice, salsa and cheese
Bake covered with foil at 350 for about 40 minutes uncover and bake 10-15 minutes longer. let sit 5 minutes before cutting . After baking top with sour cream,diced onion and shredded lettuce if desired.


Saturday, November 22, 2014

Vegetable Quinoa Slow Cooker Soup


This is the pre-cooked picture - just placed in slow cooker!

INGREDIENTS:

2 medium russet potatoes, cut in small pieces, approx 2 cups
2 zucchini, cut in circles then quartered, approx. 3-4 cups
1 summer squash, cut in circles then quartered, approx. 1-2 cups
1 (baseball sized) sweet onion, cut in small wedges
2 cups sugar snap peas, ends snipped, cut in half
1 - 8 oz. pkg mini bella mushrooms (I bought whole ones, cut in half, then wedged)
1 cup quinoa, rinsed (do not pre-cook)
2 - 14.5 oz cans petite diced tomatoes, low sodium, undrained
3 fresh garlic cloves, minced (approx. 3-4 tsp)
1 Tbsp dried basil
1 Tbsp dried thyme
1 tsp dried bay leaves
1 tsp garlic powder
1 - 32 oz box vegetable broth 

I just added everything to the 6- qt. slow cooker, gave it a good stir, put the lid on and turned on low.

Probably cook about 6 hours on Low or until veggies (specifically the potatoes) are tender.

Other options: 
May use sweet potato instead of, or in addition to, russet.
May add fresh cut green beans.

This is really a 'toss whatever veggies ya got' in the slow cooker. Add your favorite broth, herbs and spices and enjoy!


Saturday, October 4, 2014

Stuffed Pepper Soup


Above is the link to the original recipe.

Below is my recipe...

Ingredients:

1 lb lean ground round
12 oz ground Italian sausage (cuz that's what I had in my freezer)
1 Tbsp Olive Oil
3 (14.5 oz) cans diced tomatoes (I used 1 petite and 2 regular)
1 (15 oz) + 1 (8 oz) cans tomato sauce
3 cups beef broth (I used one 15 oz can + made 1 cup of my own using hot water and beef soup base)
3 bell peppers, diced (I used 2 green and 1 red), your choice really
1 cup sweet onion, diced (or one medium size)
2-3 Tbsp fresh minced garlic
1 (8 oz) pkg fresh mushrooms
1 Tbsp each Parsley, Oregano and Basil
Garlic Pepper seasoning, to taste (I use Tastefully Simple brand)
1 cup uncooked rice, but you will need to cook this!


Tools needed:

large skillet, soup pot w/lid, rice steamer (or medium sauce pan/lid to cook rice), cutting board, knife, measuring spoon/cup, can opener, large spoon

Directions: 

Hint: This recipe moves pretty fast, so it's recommended you have your veggies chopped and the canned goods opened and ready to dump.

1. In large skillet: cook burger and sausage together until no longer pink. Drain grease and pat dry with paper towel. Set aside.

2. In large sauce pot (soup pot), heat olive oil over medium heat. Add diced onions and peppers (You can add mushrooms at this time too, if you want them well cooked) and saute 3-5 minutes. Add minced garlic and saute 1 minute longer.

3. Add to soup pot: diced tomatoes, tomato sauce, beef broth, parsley, oregano, basil and mushrooms (if you didn't saute them earlier). Stir well. 

4. This is the time you would want to start cooking your rice as well. Mine takes about 20 minutes.

5. Add beef/sausage to pot and stir well. Cook on same heat until boils. Then reduce heat to Simmer and cover for 30 minutes.

6. When rice is finished, add to soup and stir well. Let soup finish simmering for another 10 minutes or so, and you're done!


Now, you may add to your individual servings: shredded cheese, sour cream or whatever other things you may like with your stuffed peppers, or Soup, in this case. 

Hint: Don't add too much cheese, cuz then it all just sticks to your spoon after it's melted!


I must admit, adding the Italian sausage to this recipe has made all the difference! I absolutely love this recipe and will be making it again!

I do not think it tastes as much like a Stuffed Pepper as it could. Maybe because I used less rice and added the sausage. But I like it!

Thursday, September 18, 2014

Shannon's Famous Hamburger Pie


Ingredients:

1 box (2 pack) Pillsbury (or whatever brand you prefer) refrigerated Pie Crust
2 lbs Ground Chuck (or any type of ground beef or sirloin)
1 medium onion (I use sweet, but it's a matter of preference), diced
8 oz package fresh mushrooms, sliced or diced (canned is OK, but too salty and no flavor, in my opinion)
1 - 15 oz can Whole Kernel Corn, drained
1 - 15 oz can Diced Potatoes, drained
1 family size + 1 - 10.5 oz can Cream of Mushroom Soup, undiluted
 (I didn't have the large can, so I used 4 standard size cans instead. Works just the same.)
24 slice pkg Swiss cheese (approx.)
24 slice pkg American cheese (approx.)
1 - 8 oz bag Shredded Colby Jack (or mild/sharp Cheddar, if preferred)
fresh minced garlic, if desired, for added flavor

Tools needed: 
large skillet (and strainer to drain grease)
Pampered Chef Mix and Chop (if you have one) or whatever utensil you would normally use to cook burger.
9 x 13 baking dish
non-stick cooking spray
large mixing bowl
large spatula
can opener
cutting board, knife


Preheat oven to 350 degrees

Cook ground chuck* in skillet on stove top, add chopped onion and minced garlic (if preferred).
Drain liquid/grease and add to large mixing bowl.

*I love flavor! So, I will add about 3-4 Tbsp fresh minced garlic to the burger while it's cooking. Or I might add Tastefully Simple Garlic Pepper Seasoning or a multi-seasoning of some sort. It all depends on how much flavor you like in your burger.

In large bowl - Add the burger mixture, corn, potatoes, mushrooms and soup. Mix well. Set aside.

Add caption


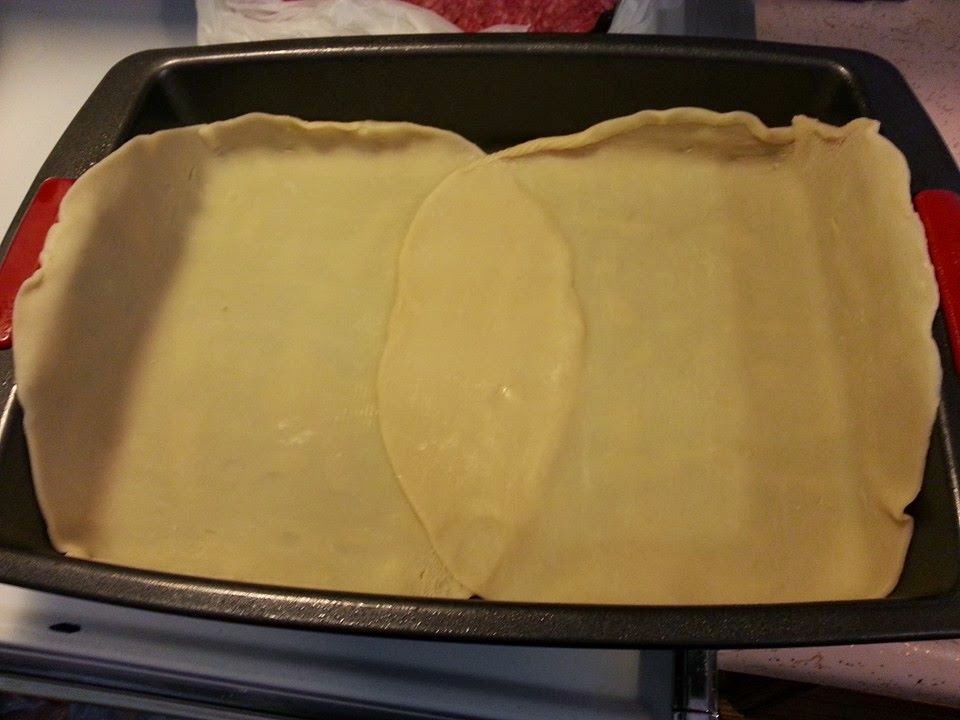
Lightly spray your 9 x 13 baking dish. Carefully unroll pie crusts and position in baking dish so as to cover bottom and as much of sides as you can. This is difficult to do with a round object and a rectangular pan, but do your best. Gently press dough to remove creases and bubbles.


Starting at one end of your pan, begin placing one type of cheese in an over-lapping pattern, in a single line from top to bottom (or side to side if that's how your point of view is skewed).


Repeat this process with the other cheese until the alternating layers of cheese slices cover the whole bottom and sides of the baking dish.


You can see I used 18 slices (3 rows of each) of each cheese in above picture and added two additional slices of each, torn in half in bottom picture. As much as we like cheese, this is a sufficient amount for us, but if you want to use the whole pkg of 24 slices, by all means, go for it! My cousin does, and this is her recipe. Just place your layers closer together than I did.


Pour burger mixture from bowl on top of cheese and spread evenly.


Bake on 350 until it starts to bubble - approximately 45 minutes to an hour - depending on your oven.

Remove from oven when bubbling, sprinkle bag of shredded cheese evenly on top. Return to oven and bake until shredded cheese is melted and bubbly, or browned, if you prefer.

When done, let sit for at least 10-15 minutes before serving.

Enjoy!!


Monday, May 5, 2014

Angie's Venison Chili

Photo taken by Me! - Angela Abernathy 05/05/14

My neighbor and I were talking the other day. She was making chili and needed to borrow some cumin. In exchange she gave me some "Mexican" oregano. I don't know what makes it Mexican, but she got it at a place called Penzy's Spices in Southfield, MI, and she said she uses it in her chili all the time.


I thought it sounded yummy so I knew I needed to give it a try. I love love love spicing up any dish and trying new things make it even more enticing.

When I realized I was going to make the chili the very next day, I had forgotten to ask my neighbor for her recipe, and she had already left for the week, so I went on an internet search for what looked like a good one.

Do you know how many different ways there are to make chili? Geez oh pizza! Mmmm Pizza. That sounds good too. Anyway, there were a lot! So, I printed a couple recipes and saved a couple more to my Pinterest  page and Allrecipes.com account.

I had to make do with what I had in my kitchen. As it was, I only had one can of beans. But who likes beans anyway. Ick! If it ain't black beans, it ain't goin' in my chili! LOL So, I had one can and got another from my Mom the next morning to make it complete.

These are the links to the two recipes I actually printed.

and

Now, here is my recipe...

Angie's Venison Chili


2 lbs ground venison
1 medium red onion, peeled and chopped (about size of tennis ball)
2 Tbsp fresh minced garlic

1 Tbsp Cumin (other recipe said 1 tsp, but I goofed. Thought it would be too much, but I don't think you can taste the difference.)
15 oz can tomato sauce
12 oz can tomato paste

28 oz can diced tomatoes
4 celery hearts stalks, chopped
2 - 15 oz cans black beans, drained and rinsed
2 Tbsp beef flavored soup base, dissolved in 1 cup hot water

2 Tbsp chili powder
3 Tbsp worcestershire sauce
1/2 Tbsp Mexican oregano
4-6 shakes hot sauce
1 tsp dried basil
1 tsp garlic powder
1/2 tsp paprika
couple shakes of salt and a few extra of course ground black pepper

What I did next:

1. In large, deep dish skillet, add venison, onion and minced garlic. Cook over med-high heat til browned. Add Cumin, tomato paste and tomato sauce. Mix well.

2. Meanwhile, in slow cooker pot, add diced tomatoes, celery, black beans and soup base/water mixture.

3. Pour contents of skillet in to slow cooker, then add all remaining spices/seasonings. Mix very well.

4. Cook on low about 6-8 hours.

We were eating our chili after about 7 hours cook time AND I stirred it twice thru-out the day. My slow cooker is older and cooks hotter on one corner than the rest so I stirred it to evenly distribute and avoid that section being burned/scorched.

I must say, I thought this recipe would taste very tomato-y because of the paste and the sauce, but it really doesn't. I think all the spices really offset the overabundance of tomato. The taste is very 'zippy' with a bit of tanginess. I don't know where that comes from, but all in all, this is a very tasty chili. Not spicy hot, cuz my daughter and I are not too much in to spicy hot.

So, try it or don't try it. Makes no difference to me. But coming from a person who has spent most of her life absolutely despising chili of any kind...I give it two thumbs up and a great big Can I Have Some More Please?!! And yes, I did have seconds!

Enjoy!


Saturday, April 26, 2014

Home-Made Thick and Creamy Mac & Cheese


OK, this has got to be one the best macaroni and cheese dishes I have ever made. I've tried lots of different recipes from web, cook books and even my Mom's homemade recipe, but this one had ZING! and was just as creamy and tasty the next day when we re-heated it for lunch.


Ingredients:

16 oz box elbow noodles (I used Barilla. In my opinion, it's the best brand out there.)
16 oz shredded sharp cheddar cheese (I think I had one bag of Meijer brand and one bag of Kraft but it really doesn't matter what kind you use)
8 oz shredded Mexican Style Four Cheese (I used Kraft brand, cuz it was what I had in my fridge)
2 cans (10.5 oz) cream of chicken soup, undiluted (I had Meijer brand)
1 cup low fat sour cream (again, Meijer brand)
1 to 1 1/2 cups low fat milk (I buy less than 2%. I didn't really measure this, I just sort of poured it in, but it was roughly one to one and a half cups.)
Tastefully Simple Garlic Garlic and Bacon Bacon seasonings

My process:

Preheat oven to 375°

Cook, drain, and dump noodles back in pot. But only if your pot is oven safe - otherwise, pour noodles in large mixing bowl and have a 13 x 9 inch greased casserole dish set aside for the baking.

Now, I'm a huge fan of Tastefully Simple products. 
If you're not, or never heard of them...What's wrong with you!?!
Their products are absolutely amazing and will enhance the flavor of any food you cook!
Find a local consultant and stock up your kitchen spice cabinet! Now! Seriously!

Once I cooked the noodles and put them back in pot, I shook in about 1-2 tbsp Garlic Garlic and 1-2 tbsp Bacon Bacon. These are the Tastefully Simple products that will become staples in your kitchen, along with their Onion Onion spice too! I kid you not!

Buuut, if you don't have these or aren't planning on getting any soon, then you can just as easily replace these two ingredients with fresh minced garlic (about 3 cloves) and either real cooked/chopped bacon bits (if you've got that much time and energy to do that) or buy the store-bought kind that come in the little pouch. I do use the Meijer brand Real Bacon Bits or Pieces quite often in baking recipes. Honestly, because I can't stand the greasy smell of cooked bacon in my house! P-U! But I would NOT recommend the crunchy salad style bacon bits. Those are just plain nasty!

OK, moving on. Next add one 8 oz bag (or half) of the Sharp Cheddar Cheese and one 10.5 oz can of condensed Cream of Chicken Soup. Stir well using the wooden spoon.

Add about one cup, or so, of milk and the rest of the cheddar cheese. I just sort of poured it in there. Didn't really measure, but I know it wasn't any more than 1 1/2 cups. Stir again.

Last, add the 8 oz of Mexican style Four Cheese shredded cheese and the remaining can of cream of chicken soup. Stir it all up nice.

Now, if you're still using the same pot you cooked the noodles in that is oven-safe for baking, then put it in the oven and cook for about 10 minutes. Otherwise, dump it in the (lightly greased) baking dish and cook it that way.

After about ten minutes, I took it out and gave it a stir to make sure it was creamy and not too dry. It should be nice and thick and creamy, but if not creamy enough for you, then add a bit more milk or sour cream. Milk might make it runnier as opposed to the sour cream that would make it creamier. The choice is yours. I didn't need to add anything.

After stirring, put it back in oven to bake for another 10 minutes. 

When done, eat and enjoy!

When I reheated it the next day, I shook on some Tastefully Simple Garlic Pepper to boost the flavor even more and I was not disappointed. It was so freaking good!

Feel free to post any comments or questions. Happy cooking!

Monday, April 21, 2014

Chicken Vegetable Slow Cooker Soup


Hmmm. Both kids have ball games tonight. Not going to be home to cook, so I raided my fridge to see what I had. Mostly vegetables. So, I tossed a bunch of stuff in the crock and this is what I created.

I do not know how this is going to taste when it's done cooking, but I'll be sure to let you know! Can't be too horrible right? I mean, these are all pretty basic ingredients! Not sure if the chicken will screw up a perfectly good vegetable soup or if it will just enhance it making it better. Who knows?

What I do know is I needed something easy and non-time consuming that will be ready when my kids get home from their ball games and are "...starving Mom. What's for dinner? Is it done yet?"!

1 pkg (approx. 1 1/2 lb) chicken tenders (vein removed and diced)
4 small red potatoes (skins on, diced - approx. 1 1/2 cups)
1 1/2 cups diced celery
1 onion, cut however you prefer, approx the size of a tennis ball
1 1/2 cups diced carrots (I cut up carrot chips in to smaller pieces, but could use baby, matchstick or cut your own from whole)
2 small zucchini, skin on, sliced rounds (I used the nice small fresh spring zucchini)
28 oz can diced tomatoes
1 box (32 oz) vegetable broth
3 tsp fresh minced garlic
3 tsp dried parsley
1 1/2 tsp dried oregano
1 tsp dried thyme
1/2 tsp black pepper
sprinkle in a dash of salt if you prefer

So, I basically just tossed this all in the slow cooker and am cooking it for 6 to 8 hours on LOW, or until everything is nice and tender. I'm sure I'll stir it a couple times throughout the day to mix up the herbs and spices.

There ya go. I'm sure this is similar to any other vegetable soup that's out there in cyber or non-cyber world, but I didn't follow anyone else's recipe. I made my own.